
[kh2walkthrunav]
World Under Attack
After leaving Space Paranoids, it’s time to access Ansem’s computer. After the scene, head back into the study to meet with King Mickey. He’s got some rather important news regarding the Organization and the situation in town! Hollow Bastion is in the middle of an all-out Heartless invasion! Head outside to the “Corridors”. The Nobodies and the Heartless are in the middle of a war. When you show up, they put aside their differences and team up to take you down!
Event: Defeat all the Enemies
|
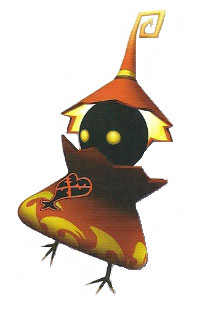 The Heartless and the Nobodies have joined forces for this fight. For the most part, this battle is completely manageable, but the Crimson Jazz Heartless can be very difficult adversaries to defeat. They unleash a barrage of explosive fireballs that follow Sora wherever he goes, making it very difficult to actually commit to an attack. Defeat them as quickly as possible to avoid being hit with this devastating attack!
When you defeat the enemies, it’s time to head outside to the “Postern”. Upon arriving, Cloud’s nemesis, Sephiroth, appears. After the scene, head down to the “Restoration Site” for another battle.
Event: Defeat all the Nobodies
|
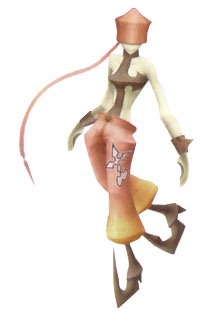 The Dancer Nobodies can be a real pain to defeat. In the beginning, they’re easy to land hits on, but when their HP gets low, they enter a state of invulnerability in which they stalk Sora until they grab him, flipping him around and dealing some rather impressive damage! Defeat them one by one and as quickly as you can to ensure you don’t take too much damage!
Organization XIII in Hollow Bastion
Head down to the “Bailey” and meet up with the King. He urges you not to go any further, but Sora pushes on anyway, bringing the gang down to the “Castle Gate”. Before they can make it any further, they run into a familiar face.
Boss: DemyxHP: 1005 STR: 29 DEF: 16
Demyx’s attacks can all be marked by specific sayings that he will repeat as he advances throughout the battle. They are as follows:
Most of these attacks can be avoided by simply keeping your distance from Demyx. Unfortunately, that’s not so easy. Demyx will rocket across the stage, leaving a row of geysers in his wake. This can make it difficult to stay away from him while he’s on the offensive, and it can also make it difficult to approach him when you’re ready to attack. If you’ve leveled up your Wisdom Form at all, you can use the Quick Run Ability to get close to him fast and land a few hits before he bounces back. Watch for instances in which Demyx starts coming straight at while playing his sitar. This is the opportunity to really gain the upper hand on Demyx, but only if you pull it off just right. As Demyx approaches, watch for the Show Stealer Reaction Command. If you trigger it before Demyx has a chance to touch you, you’ll interrupt his attack and bash him away, leaving him open for a few more combos. If he reaches you before you trigger it, the Reaction Command will backfire and Demyx will nail you with one of his most devastating assaults! Make good use of Limit Commands such as Comet, Knockback, and even Trinity Limit to deal damage to Demyx without taking any damage of your own. These attacks will easily deplete a considerable chunk of his HP in no time. If you planning on going into a Drive Form, we don’t recommend Valor Form. You’re going to need access to your magic at all times in this fight, so if you need to rely on a Drive Form to get you out of a bind, we recommend either Wisdom Form or Master Form. Victory against Demyx earns you an extra Armor Slot and the next Blizzard Element for Sora (upgrading his Blizzard spell to Blizzara), the Blizzard Boost Ability for Donald, and an HP +4 Get Bonus for Goofy. |
 Demyx is back, and this time, he’s not the awkward pacifist he was when you first met him in Olympus Coliseum. Like your last encounter, Demyx starts things off by summoning 50 Water Forms that you have to defeat in under 40 Seconds. Make good use of the Wild Dance Reaction Command to defeat the Forms with ease and get to the real fight.
Taking Back Hollow Bastion
After defeating Demyx, another cutscene will play. Proceed down to the “Ravine Trail” to meet up with Leon and the gang.
Event: Defeat all the Heartless with the help of Yuffie
|
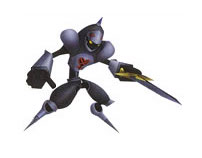
 This battle marks the first in a series of four as you make your way down the “Ravine Trail”. At each battle, a force shield will block you off from progressing any further until you defeat the Heartless that appear. Fortunately, you have Yuffie on your side in this fight. The Heartless are all enemies you’ve fought before, with the exception of the Morning Star. This tank Heartless can be a real powerhouse at times, so relentlessly power through and don’t give them an inch. Yuffie’s more powerful attacks should help you make quick work of these Heartless if things start to get too overwhelming.
Event: Defeat all the Heartless with the help of Tifa
|
 Battle number two takes place a little bit further down the “Ravine Trail”. This time you have Tifa to aid you in your fight against the Heartless. Her fast and powerful punches will help you easily defeat the Heartless that appear. Again, focus on taking out the Morning Stars first, as they present the biggest threat.
Event: Defeat all the Heartless with the help of Leon
|
 Further down the “Ravine Trail”, another Heartless ambush awaits. Luckily, Leon jumps in the fray to lend you a hand. His powerful sword attacks can make quick work of the Heartless that appear. The powerful Morning Stars are more likely too appear in these later fights, and in greater numbers. You may want to consider using a Drive Form if you have enough Drive Points. The extra power and speed may come in handy against a large group of more powerful enemies.
Event: Defeat all the Heartless with the help of Cloud
|
 The final battle lies at the very bottom of the “Ravine Trail”. Cloud swoops in from above to lend a hand against the final swarm of Heartless. His powerful sword attacks can really cut through large groups of enemies with ease. The powerful Morning Stars appear a lot in this fight, so be ready for a real struggle. You can use your Reflect spells to deflect the damage from their more powerful attacks.
At the very bottom of the “Ravine Trail” is the “Crystal Fissure”. During the cutscene, Goofy rejoins the Party. Before you press on any further, you’ll have to go into the Main Menu and reset all of Goofy’s equipment and Abilities. Sora obtains the second Cure Element, upgrading his Cure spell to Cura. Be sure to grab the Torn Pages from the nearby Treasure Chest before heading out into “The Great Maw”.
The Organization’s Trap
As soon as you enter “The Great Maw”, the true climax unfolds. The Heartless descend into the valley for the ultimate battle!
Event: Survive the 1000 Heartless Challenge
|
 Taking on 1000 Heartless all by yourself may seem like an overwhelming challenge to take on, but it’s actually a lot easier than it sounds. The two types of Heartless that make up the swarm are the Armored Knight and Surveillance Robot, two Heartless that have really useful Reaction Commands to use. Take full advantage of every single Reaction Command that you can to drastically cut through the crowd. You won’t have Drive Forms, Summons, or Limit Commands to help you, so you’ll need every advantage you can get. You can use Sora’s solo Trinity Limit Ability to cut through large amounts of Heartless almost instantly. Just remember that doing so will drain your MP Gauge.
Taking out all 1000 Heartless triggers a rather lengthy series of cutscenes that marks the gang’s escape from Hollow Bastion. You’ll obtain the Ice Cream, the Picture, and Secret Ansem’s Report 1 when all is set and done.
