
There are so many extra things to do in Kingdom Hearts: Birth by Sleep that go beyond simply completing the story. This page goes into all the details about every Side Quest available. You can use the links below to navigate through the Side Quests more easily.
Sticker Collection
 Whenever Terra, Ventus, or Aqua are traveling through the worlds on their journey, you may have noticed little floating crowns scattered throughout the areas. Those crowns are actually stickers that you can place within your Journal to collect points. The more points you acquire, the more rewards you receive. Below is a list of rewards earned by each character after a certain amount of points are acquired.
20 Points
Terra: Pulsing Crystal
Ventus: Wellspring Crystal
Aqua: Ignite
40 Points
Terra: Fireworks
Ventus: Hungry Crystal
Aqua: Shimmering Crystal
60 Points
Terra: Limit Storm
Ventus: Fireworks
Aqua: Stop Barrier
80 Points
Terra: Sonic Blade
Ventus: Collision Magnet
Aqua: Deep Freeze
100 Points
Terra: Secret Gem
Ventus: Salvation
Aqua: Secret Gem
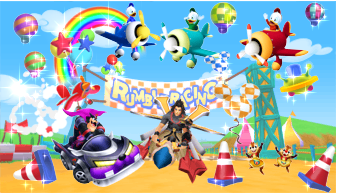
Ice Cream Collection
 The Prize Pod is a rare Unversed that drops a variety of tasty treats when they are defeated in battle. Every single hit makes it them drop plenty of different ingredients for you to collect. You can collect these delectable ingredients and bring them to Huey, Dewey, and Louie in Disney Town to exchange them for Ice Cream Item Commands. A complete list of ingredients and recipes, organized by end result, is provided below. Locations of Prize Pods within each of the three stories is also provided.
| Vanilla Glitz | |||
|---|---|---|---|
| Ingredients | Location (Terra) | Location (Ventus) | Location (Aqua) |
| Bijou Bean x1 | Enchanted Dominion: Waterway | – | – |
| Crystal Sugar x3 | Castle of Dreams: Palace Courtyard | – | – |
| Golden Jam x1 | Neverland: Skull Rock Entrance | – | – |
| Rockin’ Crunch | |||
| Ingredients | Location (Terra) | Location (Ventus) | Location (Aqua) |
| Galactic Caramel x15 | Deep Space: Turro Prison Block | – | – |
| Nutty Nut x12 |
Dwarf Woodlands: Underground Waterway Olympus Coliseum: Town Near Thebes |
– | – |
| Big Bad Pete | |||
| Ingredients | Location (Terra) | Location (Ventus) | Location (Aqua) |
| Bizarro Bean x20 | Deep Space: Turro Prison Block | – | – |
| Whipped Dream x20 | Neverland: Skull Rock Entrance | – | – |
| Honeybunny | |||
| Ingredients | Location (Terra) | Location (Ventus) | Location (Aqua) |
| Apple Pie x2 | – | Dwarf Woodlands: The Mine | – |
| Honeybunch x3 | – | Neverland: Mermaid Lagoon | – |
| Goofy Parfait | |||
| Ingredients | Location (Terra) | Location (Ventus) | Location (Aqua) |
| Chocolate Valentine x5 | – | Castle of Dreams: Mousehole | – |
| Forest Muffin x10 | – | Enchanted Dominion: Audience Chamber | – |
| Jumbo Almond x6 | – | Enchanted Dominion: Audience Chamber | – |
| Moogle Coffee x7 | – | Radiant Garden: Fountain Court | – |
| Double Crunch | |||
| Ingredients | Location (Terra) | Location (Ventus) | Location (Aqua) |
| Cherryberry x9 | – | Enchanted Dominion: Audience Chamber | – |
| Merry Dairy x5 | – | Dwarf Woodlands: The Mine | – |
| Star Syrup x15 | – | Deep Space: Durgon Transporter | – |
| Wedding Cake x14 | – | Castle of Dreams: Mousehole | – |
| Fabracadabra | |||
| Ingredients | Location (Terra) | Location (Ventus) | Location (Aqua) |
| Balloon Melon x2 | – | – | Deep Space: Turro Prison Block |
| Heroic Orange x2 | – | – | Olympus Coliseum: Town Near Thebes |
| Peach Fantasy x1 | – | – | Dwarf Woodlands: Flower Glade |
| Donald Fizz | |||
| Ingredients | Location (Terra) | Location (Ventus) | Location (Aqua) |
| Crystal Soda x8 | – | – | Castle of Dreams: Foyer |
| Fizzy Tizzy x15 | – | – | Deep Space: Turro Prison Block |
| Mermaid Salt x13 | – | – | Neverland: Indian Camp |
| Sky Blue Mousse x8 | – | – | Enchanted Dominion: Waterside |
| Royalberry | |||
| Ingredients | Location (Terra) | Location (Ventus) | Location (Aqua) |
| Birthday Cake x8 | Castle of Dreams: Palace Courtyard | – | Castle of Dreams: Foyer |
| Gaspberry x7 | Dwarf Woodlands: Underground Waterway | – | Dwarf Woodlands: Flower Glade |
| Nebula Nectar x10 | Radiant Garden: Fountain Court | – | Radiant Garden: Fountain Court |
| Rose Honey x7 | Enchanted Dominion: Waterway | – | Enchanted Dominion: Waterway |
| Milkyway | |||
| Ingredients | Location (Terra) | Location (Ventus) | Location (Aqua) |
| Cotton Cloudcandy x14 | – | Olympus Coliseum: Town Near Thebes | Olympus Coliseum: Town Near Thebes |
| Cream Fluff x10 | – | Deep Space: Durgon Transporter | Deep Space: Turro Prison Block |
| Rainbow Syrup x8 | – | Neverland: Mermaid Lagoon | Neverland: Indian Camp |
| Bueno Volcano | |||
| Ingredients | Location (Terra) | Location (Ventus) | Location (Aqua) |
| Prickle Pepper x5 | Disney Town: Raceway | Disney Town: Raceway | Disney Town: Raceway |
| Toonbasco x3 | Disney Town: Raceway | Disney Town: Raceway | Disney Town: Raceway |
| Snow Bear | |||
| Ingredients | Location (Terra) | Location (Ventus) | Location (Aqua) |
| Open Sesame x3 | Mirage Arena: Treasure Tussle | Mirage Arena: Treasure Tussle | Mirage Arena: Treasure Tussle |
| Soy Milk x5 | Radiant Garden: Fountain Court | Radiant Garden: Fountain Court | Radiant Garden: Fountain Court |
| Spark Lemon | |||
| Ingredients | Location (Terra) | Location (Ventus) | Location (Aqua) |
| Dancin’ Lemon x3 |
Neverland: Skull Rock Entrance Mirage Arena: Risky Riches |
Neverland: Mermaid Lagoon Mirage Arena: Risky Riches |
Neverland: Indian Camp Mirage Arena: Risky Riches |
| Rocket Soda x2 | Radiant Garden: Fountain Court | Radiant Garden: Fountain Court | Radiant Garden: Fountain Court |
| Thundercracker x4 | Olympus Coliseum: Town Near Thebes | Olympus Coliseum: Town Near Thebes | Olympus Coliseum: Town Near Thebes |
Hidden Bosses
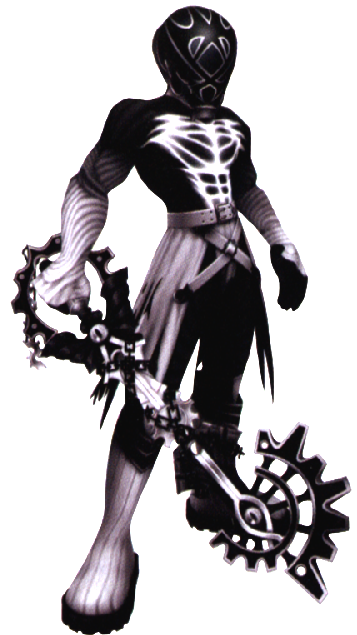
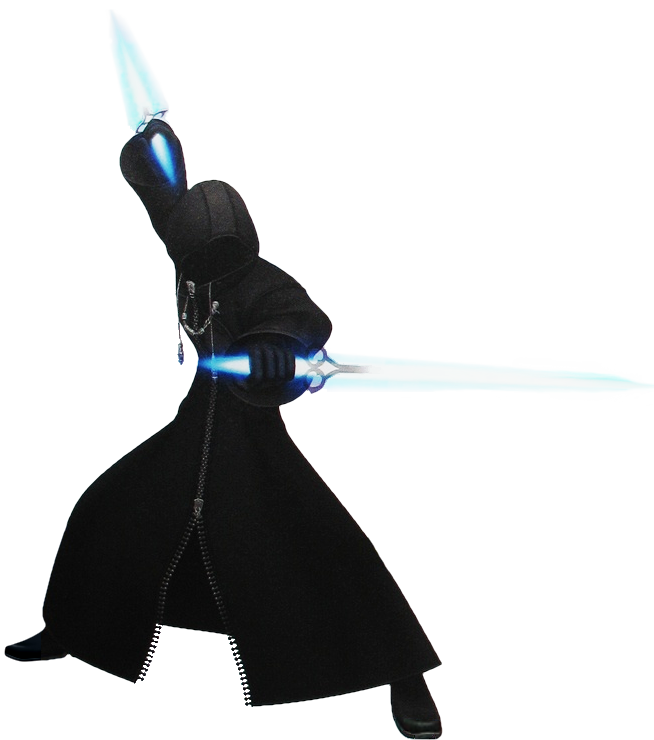
Birth by Sleep offers two extra bosses to take on after all of the events in the story are complete. The first is Vanitas’s Lingering Sentiment, a powerful adversary waiting for you at the Badlands in the Keyblade Graveyard. The second is the Mysterious Figure, who you can battle in the Land of Departure only after you have vanquished Vanitas’s Lingering Sentiment. The Mysterious Figure is quite possibly the hardest enemy in all of the Kingdom Hearts games put together!
Hidden Boss: Vanitas’s Lingering Sentiment
It’s important at the very beginning of the fight to show no fear! Charge right in using your evasion maneuver and get in a few hits. Back off before you commit to a full combo though, as this will leave you wide open for attack. If at any point in the battle, Vanitas curls up into a dark ball, begin charging your Shotlock immediately! This attack is easily his most powerful and most deadly, and there’s really no hopes of dodging it. However, unleashing a Shotlock right at the moment when he begins launching his shadowy clones will provide invulnerability that lasts pretty much the entire attack, minus maybe one hit at the end. It should be noted that your Shotlock is strictly in your deck for the purpose of dodging this attack, and cannot actually deal any damage to Vanitas. Do not go around wasting it trying to get on the offensive. Any time you take damage is typically enough to fully recharge your Focus Gauge, so don’t worry about Ethers. Another rather devastating attack of his occurs when he thrusts his Keyblade into the air and a massive power surge charges all around him. This means he’s about to unleash a rather deadly barrage of combo-attacks. These are usually pretty easy to evade, but don’t get too cocky. Be sure to keep him in check at all times. Usually after he finishes this attack, he’ll pause for a split second or so. This is a good opportunity to let out an Aerial Slam. This Command allows you to deal pretty decent damage while remaining invulnerable. However, you need to know when to, and when to not use it. Aerial Slam is only good for those few moments when he’s not on the offensive, and should not be used as your primary means of attack. One of his other rather crippling attacks involves him slashing through the air and leaving energy pillars in his wake. These pillars will then rush in and fill the gap left behind by this slashing attack. If you are caught in the blasting zone, not only will your HP be reduced to 1, but your peripheral vision will be significantly diminished, as this attack causes the majority of your screen to go black. At that point, you’re pretty much as good as dead. This attack is really easy to avoid though, so this shouldn’t be too much of a problem. Typically at the end of this attack, hell drop to the ground and start simply running toward you at a relatively slow speed. This is the perfect opportunity to lay down a Mine Shield. He’ll run right into it and be launched skyward. While he’s airborne, feel free to hit him with an Aerial Slam, as this will provide some extra damage while he can’t really retaliate. His final attack to watch out for is essentially a Shotlock command that unleashes an enormous beam of energy in a straight line. This attack is the easiest of his onslaughts to dodge, and you can sneak around behind him and let out an Aerial Slam to deal some damage while he’s occupied. The rest of his attacks are simply more powerful and more deadly versions of attacks you’ve encountered by fighting Vanitas in the main stories. Be on the lookout for those as well, and deal with them in a similar manner to how you did during the game. Victory over this overwhelming foe gets you the Void Gear Keyblade, as well as the opportunity to fight an even scarier adversary! |
 Before entering this battle, it is important to make the following changes to your Command Decks: First, remove all Cure, Cura, and Curaga magic from your Deck, as this spell will not come in handy during this fight. Vanitas will be able to heal himself if you use these Magic Commands in battle. Instead, fill your Command Deck with Potions, as these will keep your HP up enough to keep fighting. You should have four Deck slots filled with Potions. Second, fill the remaining slots with Aerial Slam Commands and Mine Shield Commands. You can’t block his attacks anyway. These two attacks will be very useful in this fight. Third, remove Block/Barrier Commands from your Action Deck, as this will prevent you from accidentally blocking when you go to evade his attacks. Fourth, use a Salvo-type Shotlock Command in your Deck such as Flame Salvo or Dark Volley. Shotlocks that last longer are best in this fight. Finally, make sure that your HP Boost, Attack Haste, Magic Haste, Item Boost, Second Chance, and Once More Abilities are equipped to their highest level. Now that you’ve made the necessary preparations, get ready for a true test of your skills.
Hidden Boss: Mysterious Figure
The Mysterious Figure is a very difficult foe to take on. You won’t get to unload too many full-blown combo attacks on him, so you’ll have to solely rely on your Thunder Surge Commands to deal damage to him. You may spend the majority of this battle mashing the Square Button to avoid his attacks with your evasion maneuver, and that’s perfectly okay. Actually, the best strategy is to simply dodge around the area until he presents one of his two openings. The easiest opening to exploit is right after he winds back and launches his X-shaped energy attack. He’ll fall to the ground after this and remain motionless for a split second. Use this opportunity to unload a Thunder Surge. His other opening is a bit more difficult to take advantage of. After he uses his Collision Magnet-type attack, he’ll drop down to the ground and take a split second to touch down. Right as he lands, hit him with a Thunder Surge. Just be careful not to get hit by this attack, as there is no surviving it! The only move he makes that you really need to address right away is when he pauses to create five clones of himself. The instant he stops to do this, Thunder Surge into the crowd to take out the majority of the clones in a single hit, then use your evasion maneuver to get away from him until one of his openings appears. DO NOT rely on Glide or Air Slide Commands to avoid attacks, as this method does not provide immunity to attacks while dodging. Eventually, the Mysterious Figure will become invisible during his onslaughts, so you’ll have to do a bit of blind fighting, randomly launching Thunder Surges around the arena in the hopes that, by some fluke, you manage to hit him. Following this method, eventually, you should be able to take him down. Victory against this mighty foe earns you the No Name Keyblade. |
 Before entering this fight, you’ll want to make some changes to your Command Deck. Your Deck should contain 8 commands: 4 of them should be fully maxed Cure spells, and the other 4 should be fully maxed Thunder Surge Commands. Cure is almost better than Cura or Curaga in this instance, as all of his attacks will reduce you to 1 HP anyway, and Cure reloads faster. Your Shotlock Command does not matter in this fight, as you will not be using it at all. Make sure that the Attack Haste, Magic Haste, HP Boost, Thunder Boost, Second Chance, and Once More Abilities are all equipped to their highest level. You should be using the Keyblade with the strongest ATK for this battle, as you will not be using offensive magic. When you’re ready to go, land in the Land of Departure. As soon as you touch ground, you’ll be pulled into the battle, so be ready to fight for your life!
Trophies
You can collect Trophies by meeting certain requirements throughout the game. These Trophies carry over through all three stories, and earn you extras if you manage to collect them. Each Trophy is detailed below.

|
Power WalkerTake 99,999 steps |

|
Key SlingerDefeat 9,999 Unversed |

|
ClockworkPlay the game for 80+ hours |
|
Arena SweeperClear all Mirage Arena challenges |

|
Dairy DevoteeUse Frozen Fortune 30 times |
|
In the MunnyObtain 3,333 Munny |

|
One DownFinish one character’s story |
|
Trinity TrophyBeat the game on Proud or Critical Mode |