The Cavern of Remembrance is a completely new area of Hollow Bastion filled with brand new enemies (for details, refer to the “New Heartless” page under the Kingdom Hearts II: Final Mix + Drop-Down Menu) and challenges.
Navigating the Cavern
 In the middle of the Heartless Invasion during your third visit to Hollow Bastion, a new area is opened up inside the walls of the old castle by the Postern. This new explorable area is known as the Cavern of Remembrance.
The Cavern of Remembrance is meant to be a difficult area to traverse, as the enemies inside it are not for low-leveled players. In order to fully navigate this area, you’ll need to have all four Form-specific Abilities (High Jump, Quick Run, Aerial Dodge, and Glide) fully leveled up. Each specific area is detailed below.
Cavern of Remembrance: Depths
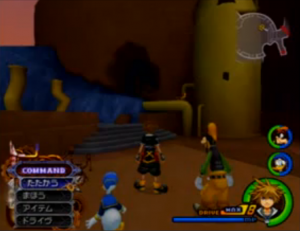
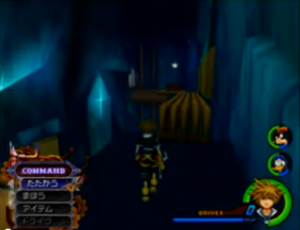
 The Depths are the first area, which you will need High Jump to pass through. The Red Orb at the beginning of the area indicates that you will need Valor Form’s High Jump ability to pass. You don’t need to actually go into Valor Form to get through, but you will need the High Jump LV3 to get up the first ledge and make it through the next room.
The various pillars high up in the middle of the room mark the path you’ll need to take to make it to the next area. The chasm below is filled with all sorts of nasty Heartless, so it’s best to avoid falling down there unless you’re high-leveled and willing to put up one heck of a fight. You’ll need to jump across the pillars to reach the door at the far end of the room.
Cavern of Remembrance: Mineshaft (Part I)
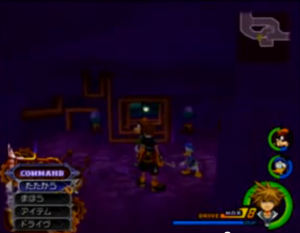 The Mine Shaft is a three part area separated by several rooms in between each section. The first section takes you to an area with a small opening and Blue Orb next to it. This indicates that you’ll need Quick Run LV3 to make it through this next area. One Quick Run straight across should be enough to get you over the gap and safe to the other side.
Once across, you’ll encounter a few waves of enemies. These particular enemies are only vulnerable to magic. So it might be a good idea to switch into Wisdom Form and take them out quickly. With the enemies dispatched, locate the opening in the cave wall off to the left side. Follow it all the way down to the Mining Area.
Cavern of Remembrance: Mining Area
 The first part of the Mining Area features three pumps with gears that need to be activated in order to traverse the rest of the Cavern. Attack all three of the gears until they are all activated. The gears will gradually repair themselves during your attacks, so it works best if you target one at a time and be as quick as possible. Once they’re on then head back up to the Depths and through the large door beyond where you fought the waves of enemies.
 This next section of the Mining Area is now buzzing with all kinds of machinery. The door you’re trying to reach is actually high up on the other end of the chasm. You’ll need to climb up the machinery and rocks to get across and reach it.
For the areas that are a little too high to simply jump to, there are whirlwinds generated by vents nearby that can be used to launch you up to higher areas. Be careful not to fall down because it’s a long way back up!
Cavern of Remembrance: Mineshaft (Part II)
 The second area of the Mineshaft requires the Aerial Dodge LV3 to make it across the gap by the Yellow Orb without hitting the pipes sticking out of the ceiling. If you fall down, don’t worry. There’s an area below with steps leading back up to the beginning of the room so you can try again.
Once you’re across this gap another few waves of enemies come at you. These enemies can be very difficult, as they typically resort to devastating, wide-range attacks that can leave you trapped taking a lot of damage. Take them out and head through the large door to the next area.
Cavern of Remembrance: Engine Chamber
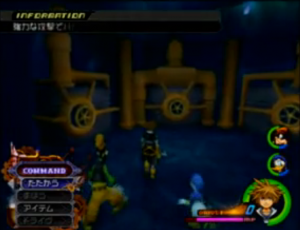
 The Engine Chamber is arguably the hardest area to get through. As if all of the obstacles in this area weren’t enough, it’s riddled with highly-leveled, highly-aggressive enemies like the Spring Metal and Reckless! The jets of steam can knock Sora backwards, making it harder to get past certain areas, especially if you’re trying to flee from enemies. Plus, the whole floor, with the exception of a few spots, consists of conveyer belts that either work with or against you as you try to make it through the room.
The area winds like a large S, first going up a ledge and then winding back the way you came up top. Then you’ll have to turn another corner and go back the way you were going, only to climb one more ledge and head back the way you came again to reach the door to the next area.
Cavern of Remembrance: Mineshaft (Part III)
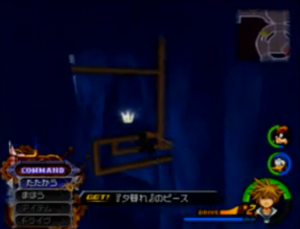 The final part of the Mineshaft is a rather simple area to get through, but you need to be careful. You’ll need to use Glide LV3 to glide around through openings in pipe clusters to reach the door on the other side. However, if you fall, it will drop you down to the previous section of the Mineshaft, forcing you to go back through the Engine Chamber and face all those enemies all over again.
You may need to actually go into Final Form to take advantage of the Glide MAX Ability, which will give you a slightly smaller angle of descent, making it somewhat easier to make it across. Once you’re on the other side, head through the door to the next area.
Cavern of Remembrance: Transport to Remembrance
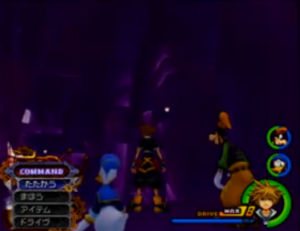
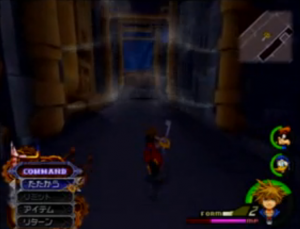
 Transport to Remembrance looks drastically different from the rest of the cavern. It’s also full of Nobodies instead of Heartless, and there sure are A LOT of them! Various waves of Nobodies are scatted throughout this long narrow area, and you’ll need to take them all out to make it through to the final room.
Going into Final Form may be a good bet here, not to mention it’s a great place to maybe level Final Form up a bit! It may seem at times that the waves of enemies are simply never going to end, but keep up with them, as they will gang up on you and pin you down. Just take it a few enemies at a time, but always keep the rest of them in check to avoid defeat!
Cavern of Remembrance: Garden of Assemblage
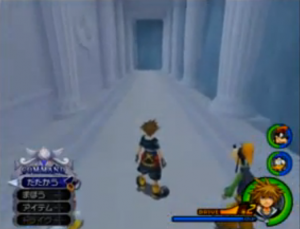
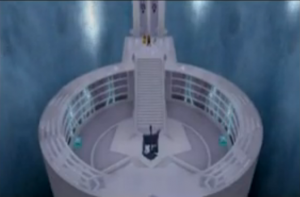 The Garden of Assemblage is probably the only room in the Cavern of Remembrance that you will frequently revisit after you’ve cleared the cavern of all the Treasure Chests and Puzzle Pieces.
Luckily, once you’ve made it this far, a new area opens up in the Restoration Area in Hollow Bastion. This will allow you to easily come in and out of the Garden of Assemblage without having to go all the way back through the rest of the cavern. Plus this allows you access the later rooms in the cave a lot sooner by simply going backwards through the cavern.
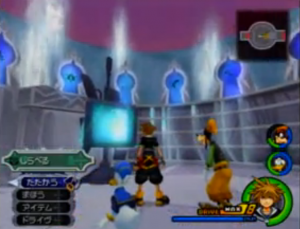 The Garden of Assemblage’s true function is only revealed after you examine the computer console in the middle of the room. Once activated, several doorways will line up along the outer rim of the Garden of Assemblage. Each of these doorways leads to a very difficult battle against Data Forms of all of the members of Organization XIII that you’ve previously defeated in the story.
These battles are not for the casual gamer. For more details you can refer to the “Data XIII Battles” page under the Kingdom Hearts II: Final Mix + Drop-Down Menu. There is also one Treasure Chest that appears in this room that will not appear until you manage to defeat all of the Data XIII Battles, making it impossible to get 100% of the Treasure Chests in Hollow Bastion without putting some serious effort in first!